


Page Contents
- How to Create Your Own Stickers at Home
- Step 2: Gather Your Materials
- Step 3: Prepare Your Design for Printing
- Step 4: Print Your Stickers
- Step 5: Let the Ink Dry Completely
- Step 6: Cut Out Your Stickers
- Step 7: Peel and Apply Your Stickers
- Step 8: Store Your Extra Stickers
- Step 9: Share or Sell Your Creations
- Step 10: Experiment and Improve
- Frequently Asked Questions
- Final Thoughts
- Further Reads
How to Create Your Own Stickers at Home
Making custom stickers is a rewarding hobby that lets you add personality to your belongings or even launch a small side business. You do not need expensive equipment or professional training. With a few basic supplies and some creativity, you can produce high quality stickers right at your desk.
This guide walks you through every step, from designing your first sticker to peeling and sticking it onto your favorite water bottle or laptop.

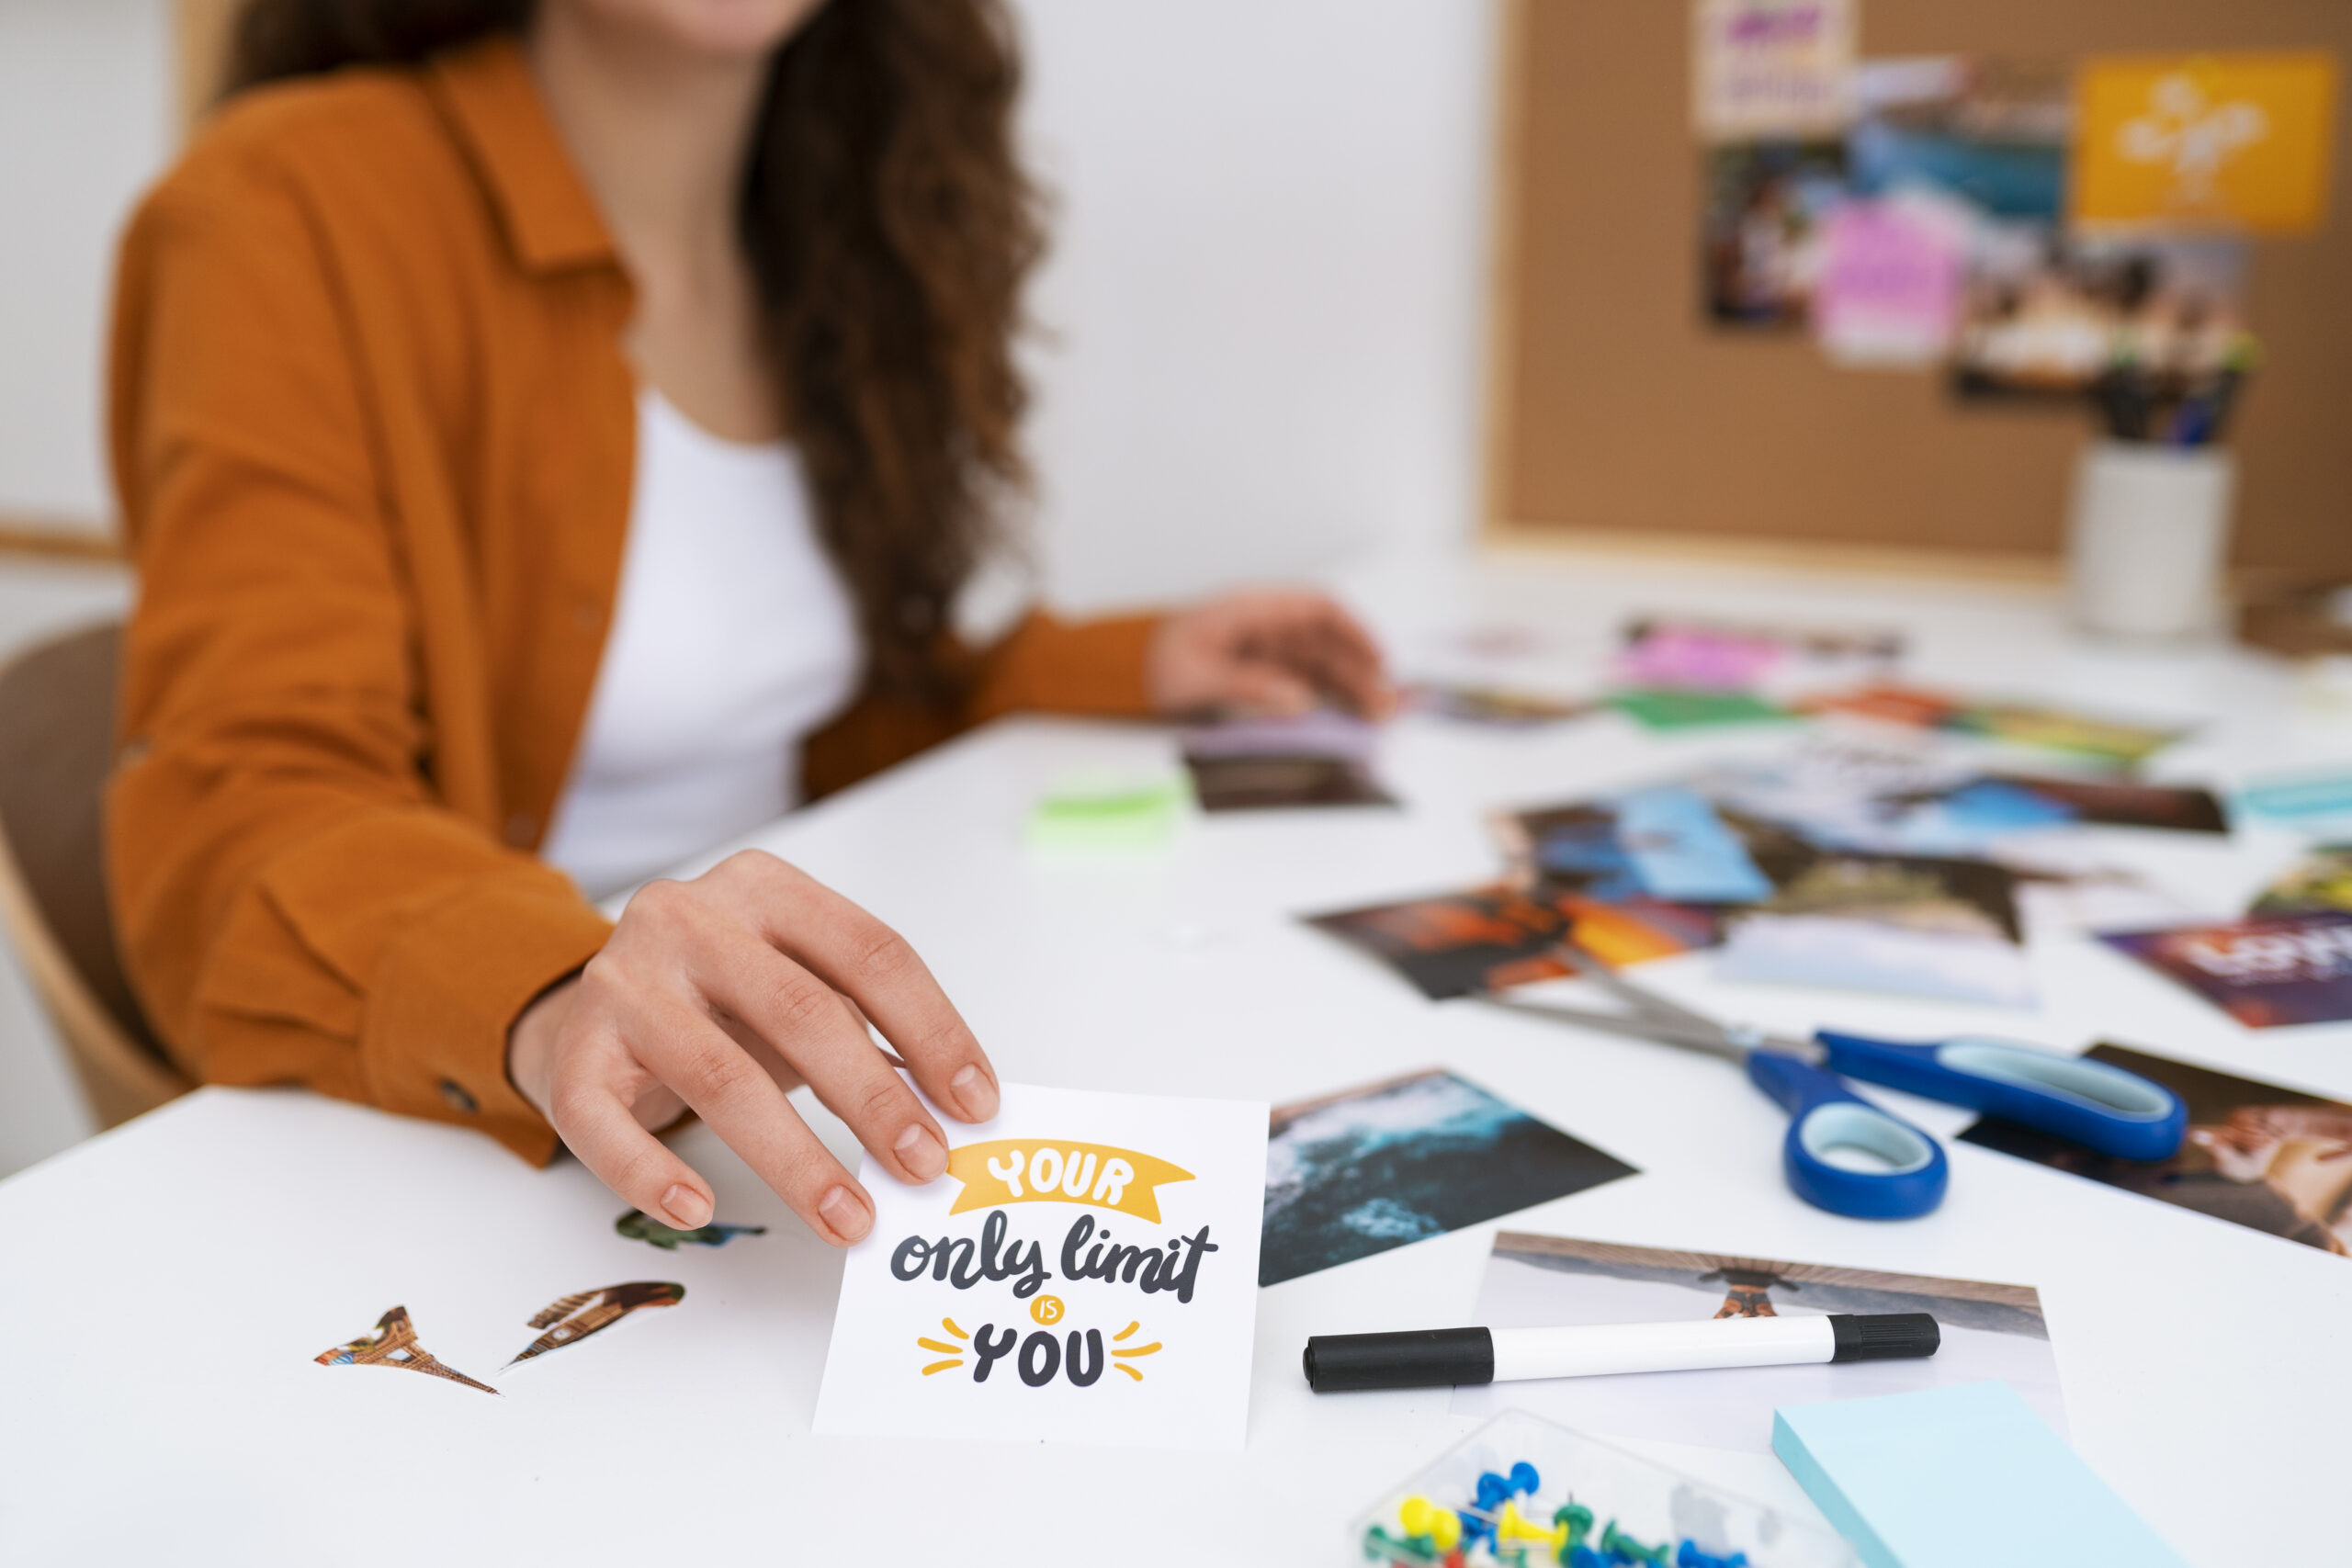
Every sticker starts with an idea. Your design can be anything: a hand drawn sketch, a digital illustration, a photo, or even a simple text quote.
Software options for beginners:
-
Canva – A free, browser based design tool with drag and drop features. It offers thousands of templates and shapes. You can start designing without any experience. Try Canva here
-
Google Drawings – A basic but functional tool included for free with any Google account. Great for simple shapes and text.
Software options for advanced users:
-
Inkscape – A completely free, open source vector graphics editor. It gives you professional control over your designs. Download Inkscape
-
Adobe Express – A free tier of Adobe’s creative suite. It includes many sticker specific templates. Explore Adobe Express
Design tips:
-
Keep your design simple. Stickers look best with bold colors and clear outlines.
-
Avoid tiny details. They may become blurry or hard to cut.
-
If your design has text, use a thick font. Thin letters can break or disappear when cut.
Step 2: Gather Your Materials

You do not need a lot of gear to start. Here is what you will need:
-
Sticker paper – This is the most important supply. Look for “inkjet sticker paper” or “laser sticker paper” depending on your printer. Many brands offer waterproof or glossy finishes. You can find affordable packs at office supply stores or online. Shop sticker paper on Amazon
-
A printer – An inkjet printer works best for most sticker papers. Laser printers also work but require specific paper types. Check the paper package before buying.
-
Cutting tools – For simple shapes, scissors work fine. For detailed or curved edges, a craft knife with a self healing cutting mat is better. For bulk or complex cuts, a digital cutting machine like a Cricut or Silhouette is ideal. See Cricut machines here
-
Design software – Any of the tools mentioned above.
-
A computer or tablet – To run your design software and send prints to your printer.
Step 3: Prepare Your Design for Printing
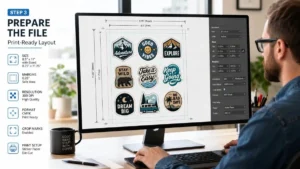
Before you hit print, you need to set up your file correctly.
-
Open your design software and create a new document.
-
Set the page dimensions to match your sticker paper. Most sticker sheets are 8.5 by 11 inches (standard letter size).
-
Place your design on the page. You can fit multiple small stickers on one sheet. Leave a little space between each design to make cutting easier.
-
If you are using clear or transparent sticker paper, you may need to mirror your design. Check the instructions on your paper package. For white or matte sticker paper, mirroring is usually not required.
-
Save your file as a PDF or high resolution PNG.
Step 4: Print Your Stickers
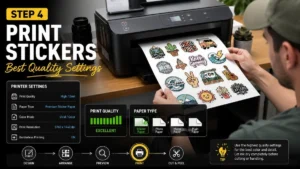
Now comes the exciting part. Printing your stickers.
-
Load one sheet of sticker paper into your printer. Make sure the printable side faces the correct direction. Most sticker paper has a marking or a slight texture on the printable side.
-
Open your printer settings. Select the highest quality print setting your printer offers. Choose “photo paper” or “premium presentation paper” as the paper type if those options exist. This prevents smudging.
-
Print a test page on regular paper first. Hold the test page against your sticker paper to check alignment and colors.
-
Once you are satisfied, print on the sticker paper.
Important: Do not touch the printed surface immediately. The ink needs time to set.
Step 5: Let the Ink Dry Completely
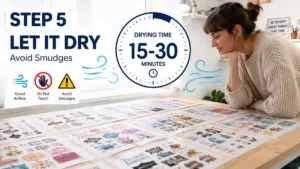
This step is easy to rush, but patience pays off. Ink on sticker paper can take longer to dry than on regular paper.
-
Wait at least 10 to 15 minutes for basic inkjet prints.
-
For glossy or waterproof sticker paper, wait 30 minutes or longer.
-
To speed up drying, lay the printed sheet flat in a dry, dust free area. Do not stack anything on top of it.
Some people use a hair dryer on a cool setting to speed up the process. If you try this, hold the dryer at least 12 inches away.
Step 6: Cut Out Your Stickers
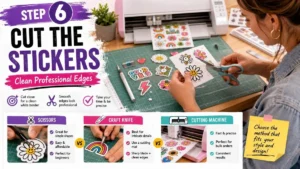
Once your sheet is completely dry, you can cut.
Using scissors: This works best for simple shapes like circles, squares, or rectangles. Cut just outside the edge of your design. A white border, also called a white bleed, looks clean and professional.
Using a craft knife: Place the sticker sheet on a cutting mat. Use a metal ruler as a guide for straight lines. Carefully trace around curved edges. This method takes practice but gives excellent results.
Using a cutting machine (Cricut or Silhouette): This is the fastest method for making many stickers. You create a cut line in your design software. The machine reads registration marks on the printed sheet and cuts automatically. Each machine has its own instructions.
Step 7: Peel and Apply Your Stickers
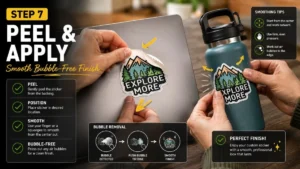
Your stickers are now ready to use.
-
Gently bend the paper backing near the edge of a sticker. The backing should separate from the sticker.
-
Slowly peel the sticker away. If the paper tears or the sticker curls, try peeling from a different corner.
-
Place the sticker onto a clean, dry surface. Good surfaces include laptop lids, water bottles, notebooks, phone cases, and skateboards.
-
Press firmly from the center outward to remove air bubbles.
Pro tip: For water bottles or items that go through the dishwasher, use waterproof vinyl sticker paper. Regular sticker paper is not dishwasher safe.
Step 8: Store Your Extra Stickers
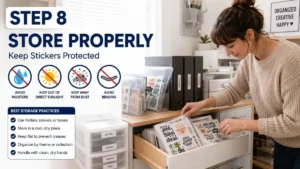
If you made more stickers than you need, store them properly.
-
Keep unused sticker sheets in a cool, dry place. A desk drawer or a plastic file folder works well.
-
Avoid direct sunlight and heat. Sunlight can fade colors and dry out the adhesive.
-
Do not bend or fold the sheet. Creases will ruin the stickers.

One of the best parts of making stickers is sharing them with others.
-
Give them as gifts to friends and family.
-
Trade stickers with other creators online.
-
Sell them on platforms like Etsy or eBay. Many small businesses start with handmade stickers. Sell stickers on Etsy
-
Set up a table at local craft fairs or flea markets. Stickers are small, lightweight, and easy to display.
If you plan to sell, consider using waterproof, UV resistant sticker paper. Customers expect their stickers to last.
Step 10: Experiment and Improve
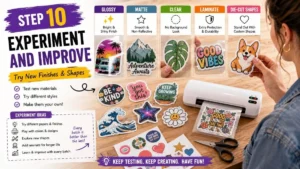
Your first batch of stickers may not be perfect. That is completely normal. Each attempt teaches you something new.
Try these experiments as you gain confidence:
-
Use glossy paper for a shiny finish.
-
Try matte paper for a soft, non reflective look.
-
Print on clear sticker paper for a “no background” effect.
-
Add a laminate layer on top for extra durability. You can buy self adhesive laminate sheets or use a thermal laminator.
-
Cut different shapes. Hearts, stars, and custom outlines make your stickers stand out.
Frequently Asked Questions
1. Can I make stickers without a special printer?
Yes. Any standard inkjet printer works for basic sticker paper. Laser printers also work but require laser compatible sticker paper.
2. What is the best sticker paper for beginners?
Avery brand sticker paper is widely available and easy to use. You can find it at most office supply stores. Online brands like Online Labels or Koala offer good quality at lower prices.
3. How do I make stickers waterproof?
You need waterproof vinyl sticker paper. Regular sticker paper will smudge or fall apart when wet. Look for “waterproof” or “weatherproof” on the package.
4. Can I use a regular printer for holographic stickers?
Yes. Holographic sticker paper works in standard inkjet printers. The paper already has a shiny, rainbow effect. You print your design on top. The result is a professional looking holographic sticker.
5. Why are my stickers smudging?
Smudging happens when the ink is not dry or when you touch the printed surface too soon. Let your stickers dry longer. Also, check that you selected the correct paper type in your printer settings.
6. Do I need a cutting machine?
No. Many people make beautiful stickers using only scissors or a craft knife. A cutting machine saves time and improves precision if you plan to make large quantities, but it is not required for beginners.
Final Thoughts
Making your own stickers at home is a fun, affordable, and creative activity. You can start with just a printer, some sticker paper, and a pair of scissors. As you gain experience, you can try new materials like waterproof vinyl or holographic paper. You can even turn your hobby into a small business.
Remember that practice makes progress. Your first stickers may not look like store bought ones, and that is perfectly fine. Each batch will get better. The most important thing is to enjoy the process and have fun seeing your designs come to life.
So grab some paper, open Canva or Inkscape, and start designing. Your laptop, water bottle, or notebook is waiting for its new sticker.
Sources and further reading:
-
Free sticker design templates – Canva Sticker Maker
-
Printable sticker paper buying guide – The Spruce Crafts
-
How to use a Cricut for stickers – Cricut Help Center
-
Selling handmade stickers online – Etsy Seller Handbook
Further Reads
If you enjoyed this guide, check out these other helpful DIY posts: