


Contouring has a reputation problem.
Most people see it as complicated. Intimidating. Something that requires a professional makeup artist and a steady hand. I used to feel the same way. The idea of chiseling out cheekbones or sculpting my nose seemed like a task best left to the experts.
But here is what I learned after years of practice: contouring is not about changing your face. It is about enhancing what is already there. Once you understand the basics, it becomes second nature.
Here is everything I wish I knew when I started.
Step 1: Know Your Face Shape
You cannot contour without understanding your canvas. Different face shapes need different placement. Get this wrong, and your contour will look harsh instead of natural.
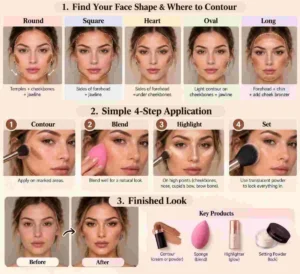
Round Faces: Contour along the temples, under the cheekbones, and along the jawline. This creates the illusion of an oval shape.
Square Faces: Soften the angles by contouring the sides of your forehead and along the jawline.
Heart-Shaped Faces: Focus on the sides of the forehead and the area under the cheekbones.
Oval Faces: You have the most flexibility. A light contour under the cheekbones and along the jawline is usually enough.
Long Faces: Contour the forehead and chin to visually shorten the face. Add bronzer to the cheeks for width.
Step 2: Choose the Right Products
Finding the right products was a game-changer for me. I have tried creams, powders, and sticks. Here is what works best.
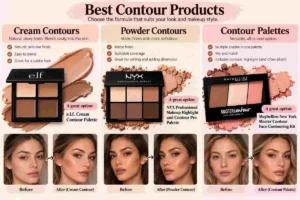
Cream Contours
Cream contours give you a natural, dewy finish. They blend seamlessly into the skin. If you want a subtle, skin-like look, cream is your best bet.
A great option: The e.l.f. Cream Contour Palette is affordable and blends beautifully. Available on Amazon.
Powder Contours
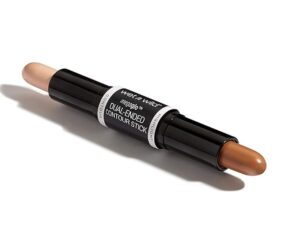
Powder contours are ideal for a more defined, matte finish. They are also great for setting cream contours and adding extra dimension.
A great option: The NYX Professional Makeup Highlight and Contour Pro Palette is a cult favorite. Available on Amazon.
Contour Palettes
If you want versatility, contour palettes are your best friend. They usually come with multiple shades, so you can mix and match.
A great option: The Maybelline New York Master Contour Face Contouring Kit is an all-in-one option with contour, highlighter, and blush. Available on Amazon.
Step 3: The Application Process
This is where the magic happens. Application technique can make or break your contour.
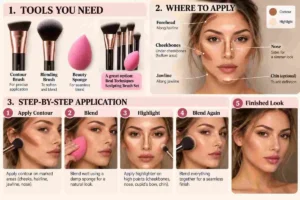
Tools Matter
Using the right tools is crucial. I recommend having both a contour brush and a blending sponge.
Contour Brush: An angled brush helps you precisely apply product under the cheekbones and along the jawline.
Blending Sponge: A damp beauty sponge works wonders for blending. It makes the contour look seamless and natural.
A great option: The Real Techniques Sculpting Brush Set is excellent for both cream and powder products. Available on Amazon.
Placement and Blending
Start by applying the contour product in the hollows of your cheeks (just below the cheekbones), along the hairline, and under the jawline.
For a slimmer nose, apply contour on the sides of the nose and blend well.
Here is the golden rule: blend, blend, and blend some more. Harsh lines look unnatural. Take your time. A good blend is the difference between a chiseled look and a muddy one.
Step 4: Highlight for Balance
Contouring alone can look flat. Highlighting the high points of your face brings balance and dimension.
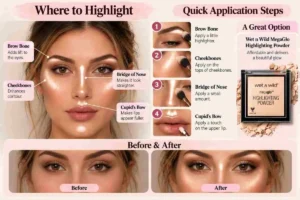
Where to Highlight
-
Cheekbones: Apply highlighter on the tops of your cheekbones to enhance the contour
-
Bridge of the Nose: A small amount down the bridge makes it look straighter and more defined
-
Cupid’s Bow: A touch of highlighter here makes lips appear fuller
-
Brow Bone: Adds lift and opens up the eyes
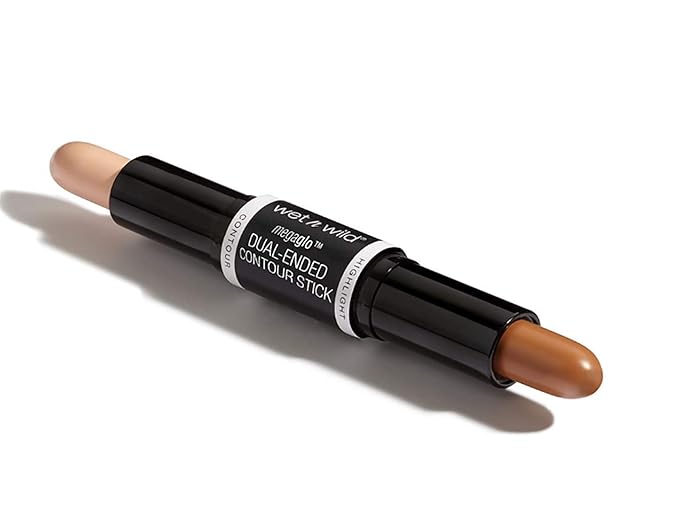
A great option: The Wet n Wild MegaGlo Highlighting Powder is affordable and delivers a stunning glow. Available on Amazon.
Step 5: Set Your Contour
To keep your contour in place all day, set it with a translucent powder. This locks everything in and reduces shine.
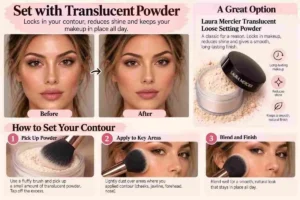
A great option: The Laura Mercier Translucent Loose Setting Powder is a classic for a reason. Available on Amazon.
Quick Reference: Contour Placement by Face Shape
| Face Shape | Where to Contour | Where to Highlight |
|---|---|---|
| Round | Temples, under cheekbones, jawline | Center of forehead, cheekbones, chin |
| Square | Sides of forehead, jawline | Center of forehead, cheekbones, chin |
| Heart | Sides of forehead, under cheekbones | Center of forehead, cheekbones, chin |
| Oval | Under cheekbones, jawline | Cheekbones, brow bone, cupid’s bow |
| Long | Forehead, chin | Cheeks, under eyes |
Frequently Asked Questions
Can I contour without a contour kit?
Yes. You can use a darker shade of foundation or bronzer. Just make sure to blend well.
How do I choose the right contour shade?
Choose a shade that is 2 to 3 shades darker than your natural skin tone. If you have cool undertones, opt for a cool or neutral base. Warm undertones work best with warmer shades.
How often should I replace my contour products?
Cream and liquid products should be replaced every 6 to 12 months. Powders can last up to 2 years. Always check the expiration date.
Can I contour my face every day?
Yes, but keep it subtle for everyday looks. Save the dramatic contour for special occasions.
What is the difference between contour and bronzer?
Contour creates shadows and defines the face. Bronzer adds warmth and a sun-kissed glow. They serve different purposes but can be used together.
Final Thoughts
Mastering contouring takes time. It is not something you nail on the first try. But with the right products and a little patience, it becomes second nature.
The goal is not to mask your face. It is to enhance your natural features. Start with a light hand. Build up slowly. And remember: blending is everything.
Ready to give it a try? Grab your products, take your time, and have fun with it. You will be a contouring pro before you know it.
Suggested Articles
Disclaimer: This article is for informational purposes only. Product recommendations are based on editorial research. Patch test all products before use, especially if you have sensitive skin or allergies.